Difference between revisions of "Shipping Procedure for Crates and Pallets (small machines)"
Jump to navigation
Jump to search
(→Setup) |
|||
| (52 intermediate revisions by 4 users not shown) | |||
| Line 1: | Line 1: | ||
[[ | [[Portal:Shipping]] | ||
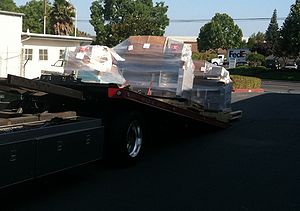
[[File:Maria-customer-1024x719.jpg|right|thumb|Several small machines being unloaded from a flatbed wrecker]] | |||
The following '''Shipping and Receiving Procedures for Crates and Pallets (small machines)''' can be used when transporting small embroidery equipment. | |||
Small equipment can be any machines that will fit on a [http://en.wikipedia.org/wiki/Pallet pallet] or inside a crate. Generally machines with 1 - 6 heads. Usually machines larger than or equal to 6 heads are better shipped LTL | |||
{{for|the Large Machine shipping and receiving info|Shipping Procedures for LTL or a Full Truck (large machines)}} | |||
==Shipping== | |||
[[File:220px-Wooden_pallet_with_glove.jpg|thumb|right|The classic wooden pallet]] | [[File:220px-Wooden_pallet_with_glove.jpg|thumb|right|The classic wooden pallet]] | ||
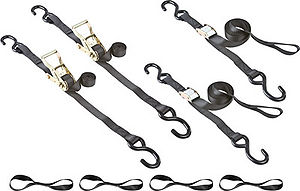
[[File:straps.jpg|thumb|right|Motorcycle Straps|Motorcycle Straps]] | |||
*Put stretch film or plastic to protect | To ensure the machine(s) purchased by the client arrives in the best condition possible, follow these simple shipping and receiving instructions: | ||
* | |||
*Take a picture of the crate or [http://en.wikipedia.org/wiki/Pallet pallet] and send | ===Packaging=== | ||
*Ask the driver to sign the BL and send it by fax to | |||
*Make sure the machine and accessories are cleaned and complete. | |||
*Package all the accessories in boxes. Tape the boxes and label the boxes with the buyers contact and shipping info. | |||
*Make sure the machine is on the middle needle so that the head is centered. If the head is not centered, it might vibrate loose. | |||
*Wrap up power cable and tuck it away so it doesn't get damaged. | |||
*Threads should be pulled through about 1 foot from the tip of the needles and then tied off together and attached to the thread holders. | |||
*Spools of thread should be pulled about 1.5 feet out from the first eyelet it enters on the machines and then cut off. The threads should then all be tied off together just left to hang. | |||
*If the machine has a thread rack that can be very easily removed or lowered then remove or lower it. | |||
*If the machine has any large halogen tube lights, then should be removed and discarded of. | |||
*If the machine is on a stand, remove the machine from the stand. The stand might need to be disassembled for shipment. | |||
*Crate the machine or place it on top of a [http://en.wikipedia.org/wiki/Pallet pallet] with all the accessories placed around or below the machine. If the boxes have to be placed on the machine, be sure to protect the machine from being scratched or damaged by the boxes. Pallets can usually be found for free at the back of industrial parks or warehouse districts. They can also be found at home improvement stores and are also usually given away for free. | |||
**There are also companies that custom make crates on location | |||
*Put stretch film or plastic around the machine to protect it from the weather or other merchandise that will be on the truck. If the machine is shipping on a [http://en.wikipedia.org/wiki/Pallet pallet] then protect any sensitive parts such as the control panel or the head. | |||
*If using a pallet, strap the machine to the [http://en.wikipedia.org/wiki/Pallet pallet] using motorcycle straps or something similar that will not damage the machine. Be sure the strap is tight enough on the machine so it does not shift when the truck is moving but, not so tight that it damages something. | |||
*Take a picture of the crate or [http://en.wikipedia.org/wiki/Pallet pallet] and send them to the buyer to verify and approve before shipping. | |||
===Loading=== | |||
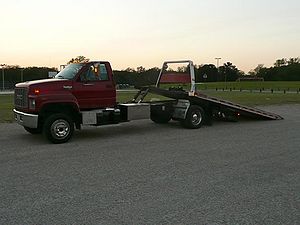
[[File:Flatbed_wrecker.jpg|thumb|right|Flatbed wrecker with lowered bed|Flatbed wrecker with lowered bed]] | |||
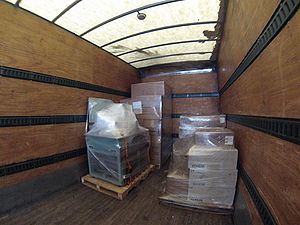
[[File:Loaded_Embroidery_Machine.JPG|thumb|right|Single Head Embroidery Machine loaded on a shipping truck|Single Head Embroidery Machine loaded on a shipping truck]] | |||
*If a dock is available at the pickup location then loading the crate or pallet into the truck should not be a problem. | |||
*If a dock is not available then a shipping truck with a lift gate might be required. | |||
*If a dock is not available and there are not any shipping trucks available with lift gates, then a flatbed Wrecker might be needed. | |||
**The flatbed operator can lower the bed of the truck to pickup the palate or crate. The flatbed wrecker should then back up to the shipping truck so that the equipment can be unloaded from the flat be wrecker into the truck. | |||
*Once the equipment is loaded, take pictures and send them to the buyer. | |||
*Ask the driver to sign a copy of the BL and send it by fax or email to the buyer. | |||
==Receiving== | |||
When receiving a small embroidery machine shipment, follow the following steps to ensure the machine arrives properly and is setup to run without any problems | |||
===Unloading=== | |||
[[File:embroidery_machine_stand.jpg|thumb|right|Single Head Embroidery Machine Stand|Single Head Embroidery Machine Stand]] | |||
*Before unloading anything, inspect the crate or [http://en.wikipedia.org/wiki/Pallet pallet] for any serious damages. Take pictures of any damages. If there appears to be any problems or serious damages, its best to contact the shipping company and/or seller for further procedures. Once the equipment is unloaded from the truck it might be difficult to claim insurance if damage's were incurred during shipping. Sellers are not responsible for any damages incurred during shipping. | |||
*If a dock is available, unloading the machine from the shipping truck should be no problem. Most all trucking companies shipping pallets or crates should provide pallet jacks. If a pallet jack is needed, its best to let the shipping company and seller know ahead of time. | |||
*If a dock is not available then a shipping truck with a lift gate might be required. | |||
*If a dock is not available and there are not any shipping trucks available with lift gates, then a flatbed Wrecker might be needed. | |||
**The flatbed wrecker should back up to the shipping truck so that the equipment can be unloaded from the shipping truck to the wrecker. | |||
**The flatbed operator then can lower the bed of the truck to lower the palate or crate. | |||
===Setup=== | |||
[[File:bubble_leveler.jpg|thumb|right|Bubble Leveler|Bubble Leveler]] | |||
*Uncrate or remove the machine from the pallet | |||
*If the machine has a stand, assemble the stand. Make sure all bolts are tight. | |||
*If the machine is going to be placed on carpet, its highly recommended to place a wooden board or something similar under the machine. | |||
*The machine and the machine stand need to be as perfectly level as possible. Most all machines and stand have leveling feet. If the machine has a stand, place the machine on the stand and level the stand. Once the stand is level, level the machine. If the machines is not perfectly level, it will vibrate causing thread and needle breaks and poor embroidery quality. The machine might also rattle or not sound as good as it would level. | |||
*If the machine has a thread rack that has been removed or lowered, set it back up. The machine will need to be threaded and each individual needle will need to have its tensions reset manually once the machine is running. Add a new fresh bobbin. | |||
*It is highly recommended to have an [[Embroidery Machine Technicians]] inspect the equipment first before applying power. The power outlet should also be inspected to ensure its outputting the proper power amount for the equipment. The machine should also be inspected to make sure its set on the right power requirements that the building is outputting. A 110V machine connected to a 220v outlet will cause serious damages to the electronics. | |||
*Oil the machine according to the manufacture specs. The machine may have lost all its oil during shipping. Do not over oil the machine or the oil might damage electronics. | |||
*Once the machine and power has been inspected and it has been oiled, the machine should be ready to connect and power up. | |||
*Its recommended not to run the embroidery machine until the operator has been properly trained to avoid headaches or very basic operator errors. | |||
*Using a very basic logo or test shapes, embroidery on each needle using scrap material until all the oil has coated and excess oil has dripped off. The tensions should be set during this time. If the machines has more than one head, it is sometimes easier setting tensions head by head rather than all of them at the same time. When setting up its recommended to work with just one head at a time. If a head has many problems, its usually best just to turn it off until an [[Embroidery Machine Technicians]] can look at it. | |||
*After running the machine for about a day with scrap material check again that it is level. If the machine has been running properly then it should be ready for production embroidery work. | |||
==Gallery== | |||
<center> | |||
<gallery> | |||
File:single_head_embroidery_machine_palletized.jpg|alt=Single head embroidery machine palatalized|Single head embroidery machine palatalized | |||
File:single_head_pallet.jpg|alt=Single head embroidery machine palatalized|Single head embroidery machine palatalized | |||
File:Maria-customer-1024x719.jpg|alt=Several small machines being unloaded from a flatbed wrecker|Several small machines being unloaded from a flatbed wrecker | |||
File:Tajima_2_head.jpg|alt=Tajima 2 head strapped to a pallet|Tajima 2 head strapped to a pallet | |||
</gallery> | |||
</center> | |||
Latest revision as of 23:58, 5 September 2013
The following Shipping and Receiving Procedures for Crates and Pallets (small machines) can be used when transporting small embroidery equipment.
Small equipment can be any machines that will fit on a pallet or inside a crate. Generally machines with 1 - 6 heads. Usually machines larger than or equal to 6 heads are better shipped LTL
For {{#if:the Large Machine shipping and receiving info|the Large Machine shipping and receiving info|other uses}}, see Shipping Procedures for LTL or a Full Truck (large machines){{#if:|{{#if:|, [[:{{{3}}}]], {{#if:|[[:{{{4}}}]], and [[:{{{5}}}]]|and [[:{{{4}}}]]}}| and [[:{{{3}}}]]}}}}.
Shipping
To ensure the machine(s) purchased by the client arrives in the best condition possible, follow these simple shipping and receiving instructions:
Packaging
- Make sure the machine and accessories are cleaned and complete.
- Package all the accessories in boxes. Tape the boxes and label the boxes with the buyers contact and shipping info.
- Make sure the machine is on the middle needle so that the head is centered. If the head is not centered, it might vibrate loose.
- Wrap up power cable and tuck it away so it doesn't get damaged.
- Threads should be pulled through about 1 foot from the tip of the needles and then tied off together and attached to the thread holders.
- Spools of thread should be pulled about 1.5 feet out from the first eyelet it enters on the machines and then cut off. The threads should then all be tied off together just left to hang.
- If the machine has a thread rack that can be very easily removed or lowered then remove or lower it.
- If the machine has any large halogen tube lights, then should be removed and discarded of.
- If the machine is on a stand, remove the machine from the stand. The stand might need to be disassembled for shipment.
- Crate the machine or place it on top of a pallet with all the accessories placed around or below the machine. If the boxes have to be placed on the machine, be sure to protect the machine from being scratched or damaged by the boxes. Pallets can usually be found for free at the back of industrial parks or warehouse districts. They can also be found at home improvement stores and are also usually given away for free.
- There are also companies that custom make crates on location
- Put stretch film or plastic around the machine to protect it from the weather or other merchandise that will be on the truck. If the machine is shipping on a pallet then protect any sensitive parts such as the control panel or the head.
- If using a pallet, strap the machine to the pallet using motorcycle straps or something similar that will not damage the machine. Be sure the strap is tight enough on the machine so it does not shift when the truck is moving but, not so tight that it damages something.
- Take a picture of the crate or pallet and send them to the buyer to verify and approve before shipping.
Loading
- If a dock is available at the pickup location then loading the crate or pallet into the truck should not be a problem.
- If a dock is not available then a shipping truck with a lift gate might be required.
- If a dock is not available and there are not any shipping trucks available with lift gates, then a flatbed Wrecker might be needed.
- The flatbed operator can lower the bed of the truck to pickup the palate or crate. The flatbed wrecker should then back up to the shipping truck so that the equipment can be unloaded from the flat be wrecker into the truck.
- Once the equipment is loaded, take pictures and send them to the buyer.
- Ask the driver to sign a copy of the BL and send it by fax or email to the buyer.
Receiving
When receiving a small embroidery machine shipment, follow the following steps to ensure the machine arrives properly and is setup to run without any problems
Unloading
- Before unloading anything, inspect the crate or pallet for any serious damages. Take pictures of any damages. If there appears to be any problems or serious damages, its best to contact the shipping company and/or seller for further procedures. Once the equipment is unloaded from the truck it might be difficult to claim insurance if damage's were incurred during shipping. Sellers are not responsible for any damages incurred during shipping.
- If a dock is available, unloading the machine from the shipping truck should be no problem. Most all trucking companies shipping pallets or crates should provide pallet jacks. If a pallet jack is needed, its best to let the shipping company and seller know ahead of time.
- If a dock is not available then a shipping truck with a lift gate might be required.
- If a dock is not available and there are not any shipping trucks available with lift gates, then a flatbed Wrecker might be needed.
- The flatbed wrecker should back up to the shipping truck so that the equipment can be unloaded from the shipping truck to the wrecker.
- The flatbed operator then can lower the bed of the truck to lower the palate or crate.
Setup
- Uncrate or remove the machine from the pallet
- If the machine has a stand, assemble the stand. Make sure all bolts are tight.
- If the machine is going to be placed on carpet, its highly recommended to place a wooden board or something similar under the machine.
- The machine and the machine stand need to be as perfectly level as possible. Most all machines and stand have leveling feet. If the machine has a stand, place the machine on the stand and level the stand. Once the stand is level, level the machine. If the machines is not perfectly level, it will vibrate causing thread and needle breaks and poor embroidery quality. The machine might also rattle or not sound as good as it would level.
- If the machine has a thread rack that has been removed or lowered, set it back up. The machine will need to be threaded and each individual needle will need to have its tensions reset manually once the machine is running. Add a new fresh bobbin.
- It is highly recommended to have an Embroidery Machine Technicians inspect the equipment first before applying power. The power outlet should also be inspected to ensure its outputting the proper power amount for the equipment. The machine should also be inspected to make sure its set on the right power requirements that the building is outputting. A 110V machine connected to a 220v outlet will cause serious damages to the electronics.
- Oil the machine according to the manufacture specs. The machine may have lost all its oil during shipping. Do not over oil the machine or the oil might damage electronics.
- Once the machine and power has been inspected and it has been oiled, the machine should be ready to connect and power up.
- Its recommended not to run the embroidery machine until the operator has been properly trained to avoid headaches or very basic operator errors.
- Using a very basic logo or test shapes, embroidery on each needle using scrap material until all the oil has coated and excess oil has dripped off. The tensions should be set during this time. If the machines has more than one head, it is sometimes easier setting tensions head by head rather than all of them at the same time. When setting up its recommended to work with just one head at a time. If a head has many problems, its usually best just to turn it off until an Embroidery Machine Technicians can look at it.
- After running the machine for about a day with scrap material check again that it is level. If the machine has been running properly then it should be ready for production embroidery work.


