Difference between revisions of "Melco USB Upgrade"
| (10 intermediate revisions by the same user not shown) | |||
| Line 1: | Line 1: | ||
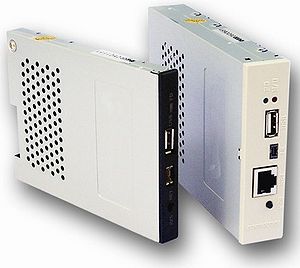
[[File:usbtofloppy.jpg |thumb|right|alt=Floppy To USB upgrade for Melco|Floppy To USB upgrade for Melco]] | [[File:usbtofloppy.jpg |thumb|right|alt=Floppy To USB upgrade for Melco|Floppy To USB upgrade for Melco]] | ||
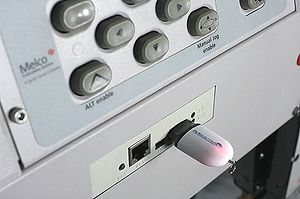
[[File:Melco_usb3.jpg |thumb|right|alt=[[Melco|Melco EMC/EMT]] Single-head floppy drive replaced with USB|Melco boot disk floppy replaced with USB stick boot disk]] | |||
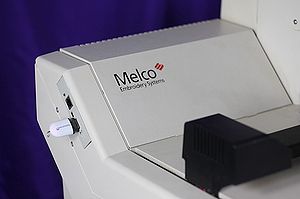
[[File:Melco_usb2.jpg |thumb|right|alt=Melco EMC/EMT Multi-head with USB Upgrade|Melco EMC/EMT Multi-head with USB Upgrade Boot Disk]] | |||
The '''Melco USB upgrade''' uses the [[Floppy To USB]] device | The '''Melco USB upgrade''' uses the [[Floppy To USB]] device | ||
This can be a replacement for the Ethernet system and the floppy drive that [[Melco|Melcos]] typically use. | This can be a replacement for the Ethernet system and the floppy drive that [[Melco|Melcos]] typically use. | ||
{{for|information on the Melco Embroidery Machine|Melco}} | |||
==Connection== | ==Connection== | ||
| Line 8: | Line 13: | ||
The first step it to verify that the Melco machine has the connectors for a floppy drive. If the machine already has a floppy drive, then the drive model USB-A001 from http://www.BuyUSBFloppyUpgrade.com. | The first step it to verify that the Melco machine has the connectors for a floppy drive. If the machine already has a floppy drive, then the drive model USB-A001 from http://www.BuyUSBFloppyUpgrade.com. | ||
The connectors are located on the main mother board. On EMC single heads, this board is located behind the left hand side plastic cover. On 4 heads, this board is at the back of the machine underneath the covers. | |||
If the Melco machine is a black head Tajima type, then the floppy to USB will not work. | |||
If the machine is already equipped with a floppy then follow the cables to where they connect to the mother board. The same data and power cable that connect to the follow can be used on the [[Floppy To USB]] upgrade. | |||
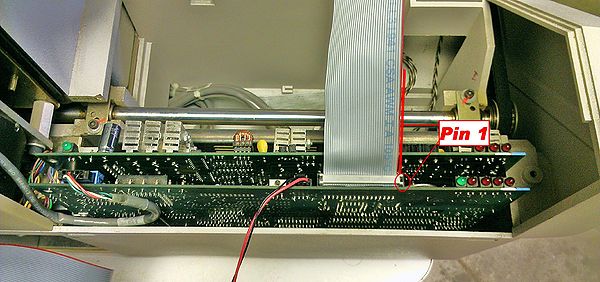
[[File:melco_data_power.jpg|600px|center]] | |||
==Installation== | |||
If the Melco machine is already equipped with a Floppy Drive, then the [[Floppy To USB]] upgrade will replace the Floppy Drive seamlessly. Just remove the old floppy and install the Floppy To USB in the reverse order. | |||
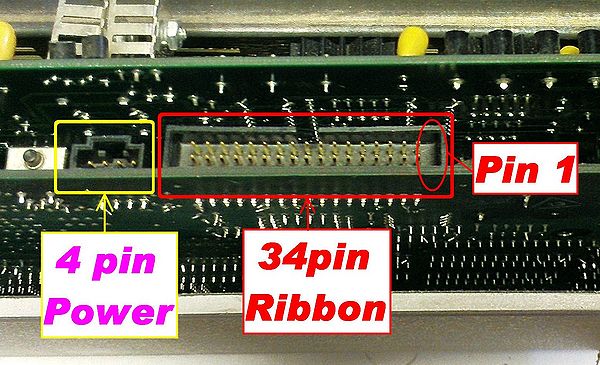
If the machine does not already have a floppy, just make sure it has these 2 connectors. | |||
[[File:melco_pin_info.jpg|600px|center]] | |||
The data cable (widest grey cable in the picture) should have a red colored wire on one end of the cable. This is know as PIN 1. Pin 1 (red cable) should line up with pin 1 on both the USB drive and the machine mother board. | |||
==Melco Boot Disk== | |||
A Melco Boot Disk (USB DISK) will also be required. When purchasing the Floppy To USB be sure to request the USB BOOT DISK for the exact model of Melco that the drive will be going into. | |||
==Replacement== | |||
The Floppy to USB can replace: | |||
*Premier Keyboards | |||
*Melco Floppy Disks | |||
*Melco Ethernet System | |||
*EDS | |||
The upgrade works with the following Melco embroidery machines WITH the mentioned connectors: | |||
*[[Melco#EMC6M_.28While_Melco_Head.29|EMC6M (While Melco Head)]] | |||
*[[Melco#EMC10|EMC10]] | |||
*[[Melco#EMC10.2F4|EMC10/4]] | |||
*[[Melco#EMC10.2F12|EMC10/12]] | |||
*[[Melco#EMT_10T|EMT 10T]] | |||
*[[Melco#EMT_10.2F4T|EMT 10/4T]] | |||
The upgrade DOES NOT WORK with: | |||
*[[Melco#EMC6_.28Black_Tajima_Head.29|EMC6 (Black Tajima Head)]] | |||
*[[Melco#AMAYA_Series|AMAYA Series]] | |||
Latest revision as of 18:00, 26 November 2013
The Melco USB upgrade uses the Floppy To USB device
This can be a replacement for the Ethernet system and the floppy drive that Melcos typically use.
Connection
The first step it to verify that the Melco machine has the connectors for a floppy drive. If the machine already has a floppy drive, then the drive model USB-A001 from http://www.BuyUSBFloppyUpgrade.com.
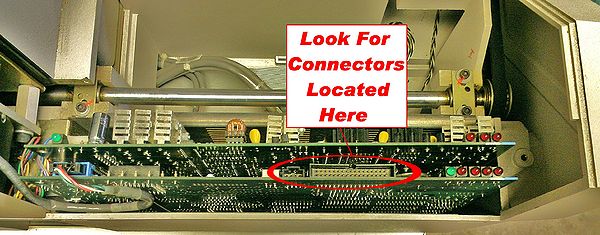
The connectors are located on the main mother board. On EMC single heads, this board is located behind the left hand side plastic cover. On 4 heads, this board is at the back of the machine underneath the covers.
If the Melco machine is a black head Tajima type, then the floppy to USB will not work.
If the machine is already equipped with a floppy then follow the cables to where they connect to the mother board. The same data and power cable that connect to the follow can be used on the Floppy To USB upgrade.
Installation
If the Melco machine is already equipped with a Floppy Drive, then the Floppy To USB upgrade will replace the Floppy Drive seamlessly. Just remove the old floppy and install the Floppy To USB in the reverse order.
If the machine does not already have a floppy, just make sure it has these 2 connectors.
The data cable (widest grey cable in the picture) should have a red colored wire on one end of the cable. This is know as PIN 1. Pin 1 (red cable) should line up with pin 1 on both the USB drive and the machine mother board.
Melco Boot Disk
A Melco Boot Disk (USB DISK) will also be required. When purchasing the Floppy To USB be sure to request the USB BOOT DISK for the exact model of Melco that the drive will be going into.
Replacement
The Floppy to USB can replace:
- Premier Keyboards
- Melco Floppy Disks
- Melco Ethernet System
- EDS
The upgrade works with the following Melco embroidery machines WITH the mentioned connectors:
The upgrade DOES NOT WORK with:
